I’ve decided to attempt to increase the Meshtastic footprint of Harkers Island. My opinion is that infrastructure nodes should either have a battery for multiple days or be solar. An additional requirement for my application was for the node to be able to survive in salt air. Some nodes may be placed only a few feet above salt water. I wanted the total price to be around $50 (assumes I have some scrap PVC around).
Meshtastic
Meshtastic is an open-source communication system designed for off-grid, long-range messaging, using mesh networking technology. It allows users to send text messages and share location data without relying on cellular networks or Wi-Fi, making it ideal for situations where traditional communication infrastructure is unavailable, such as remote areas, outdoor adventures, or during emergency situations.
At its core, Meshtastic utilizes LoRa (Long Range) radio technology to create a mesh network between devices. This means each device can communicate with its neighbors, and the messages can be relayed over long distances by “hopping” through multiple devices, extending the network range. This system allows users to send messages even when they’re miles apart, as long as there’s a chain of devices in between to relay the information.
Typical hardware for Meshtastic devices includes small, portable LoRa radio modules such as the T-beam, T-dot, TTGO devices, and the Heltec units. These devices often come equipped with GPS capabilities and are designed for rugged, portable use, with some models featuring solar charging options for extended outdoor use. They typically include a small screen (for displaying messages) and can be paired with smartphones via Bluetooth, allowing users to send and receive messages through the Meshtastic app.
Range varies depending on environmental conditions, terrain, and antenna setup. In open, line-of-sight environments, the range can extend from 3 to 6 miles, or more. In more obstructed environments, like forests or urban areas, the range may be reduced to around 2 to 4 miles. The flexibility of the mesh network allows it to adapt to different situations and expand coverage by adding more devices to the network.
Figured it may be beneficial to myself and other to document the installation journey. Hope it may spur ideas in other people.
Alternatives Considered
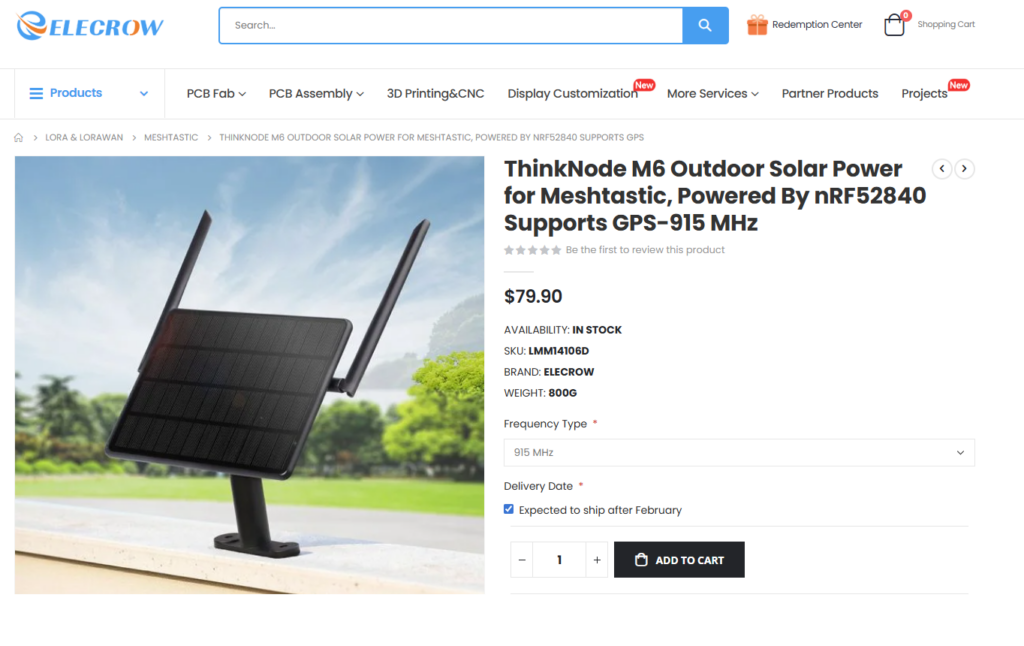
My goal was to be as dead cheap as practical and easy. If you want to spend a few more dollars, Elecrow seems to have a nice turnkey unit for under $100. I may give it a shot in the future to see how it holds up in the salt air.
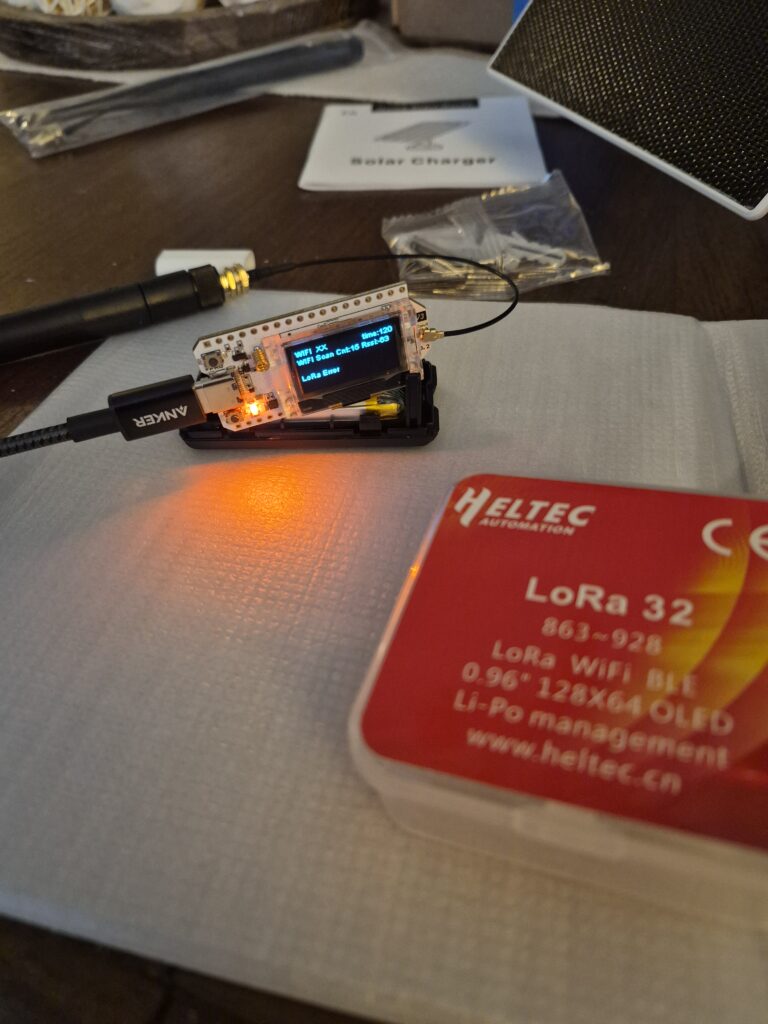
At the core of the Meshtastic install is the Heltec V2 LoRa 32 module. It provides the computer, the LoRA transmitter, a display, Bluetooth, and Ethernet (in our case we don’t use Ethernet). As a bonus, the plastic case it comes in is a fairly nice case for storing hobby nick-nacks. As it will be a fixed location, I don’t need a GPS.
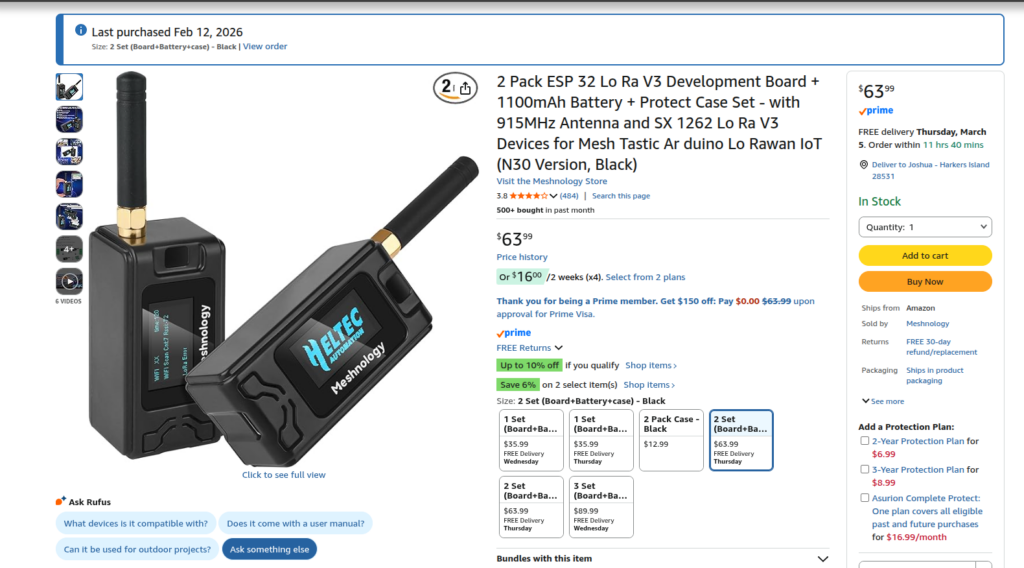
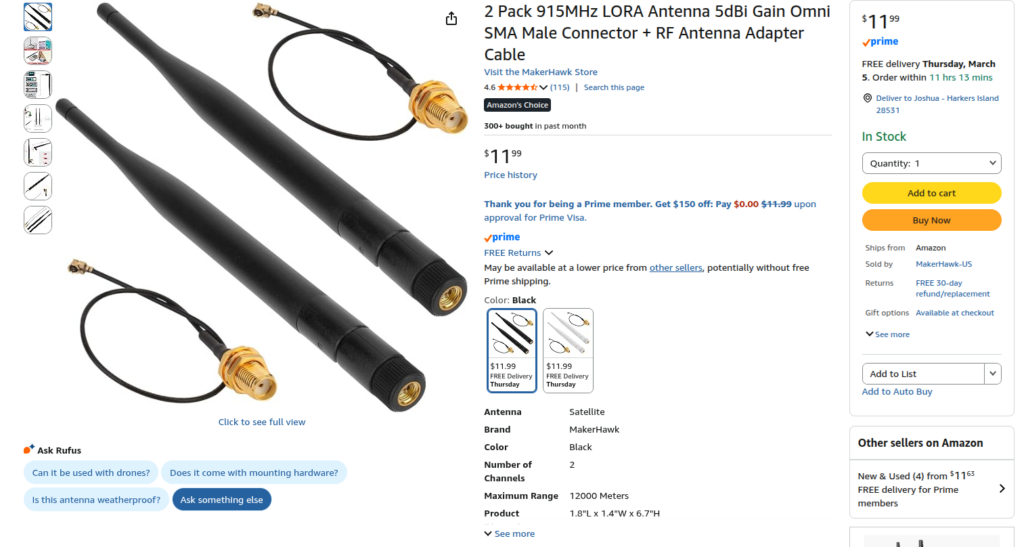
I purchased the Heltec V3 (there is a new version out for a higher cost) from Amazon. I got a kit. The kit had a battery, a cheap antenna (you really should replace it), and a nice case. In my case, I went with the two pack.
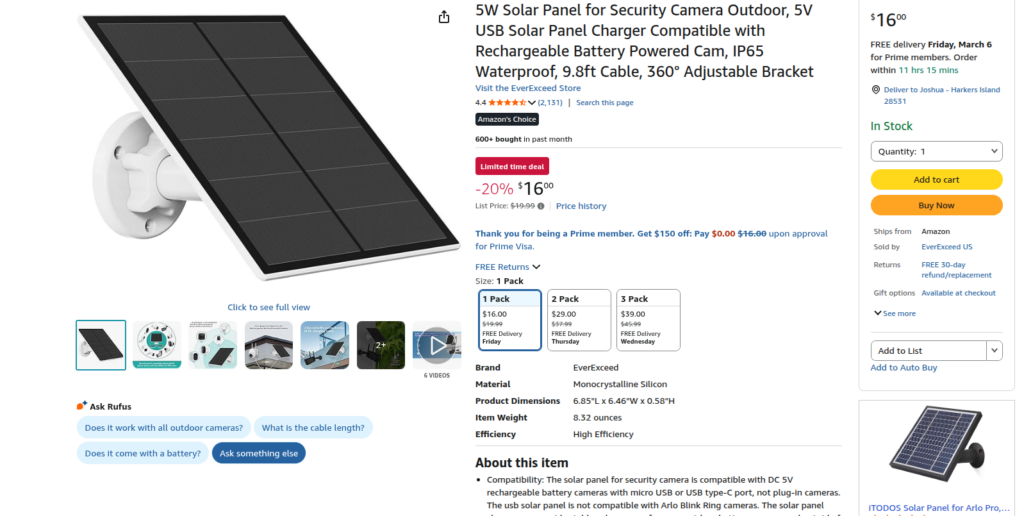
The solar panel I used was a USB solar channel. This was important to me as it should already have all the voltage regulation built into it and greatly simplified my install. Again I purchased from Amazon.
The antennas that come with the kit are really not suitable for router/repeater service. So I upgraded them to something better while still being inexpensive.
I used the Meshtastic Web Flasher. This is an awesome tool. You use the Chrome Web Browser and it will write the firmware to the device. The interface is easy and intuitive. Instructions.
Do not flash the Meshtastic node before you attach an antenna. Failing to do so can damage the radio.
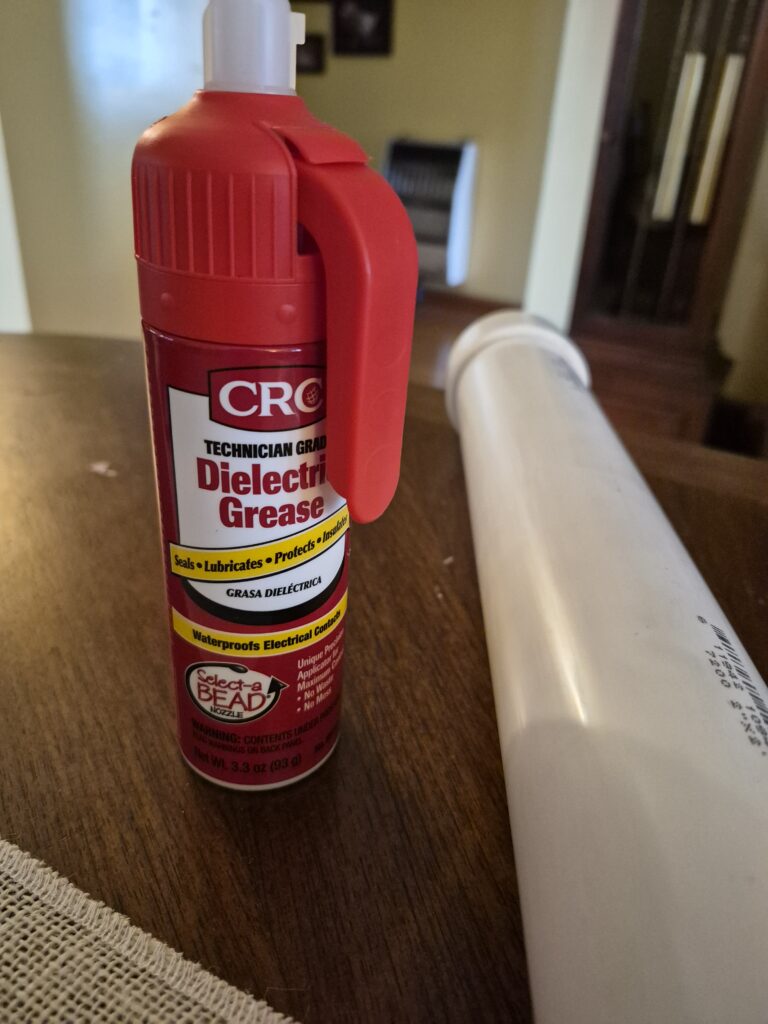
Before placing in the case, I coated every surface I could get to with dielectric grease. I put extra gobs of it on the connectors. The idea (and the experiment) is that if any moisture gets inside, the grease will be another level of protection. This was a very messy endeavor and I strongly recommend either doing it outdoors or put down something to contain the greasy mess you’re about to make.
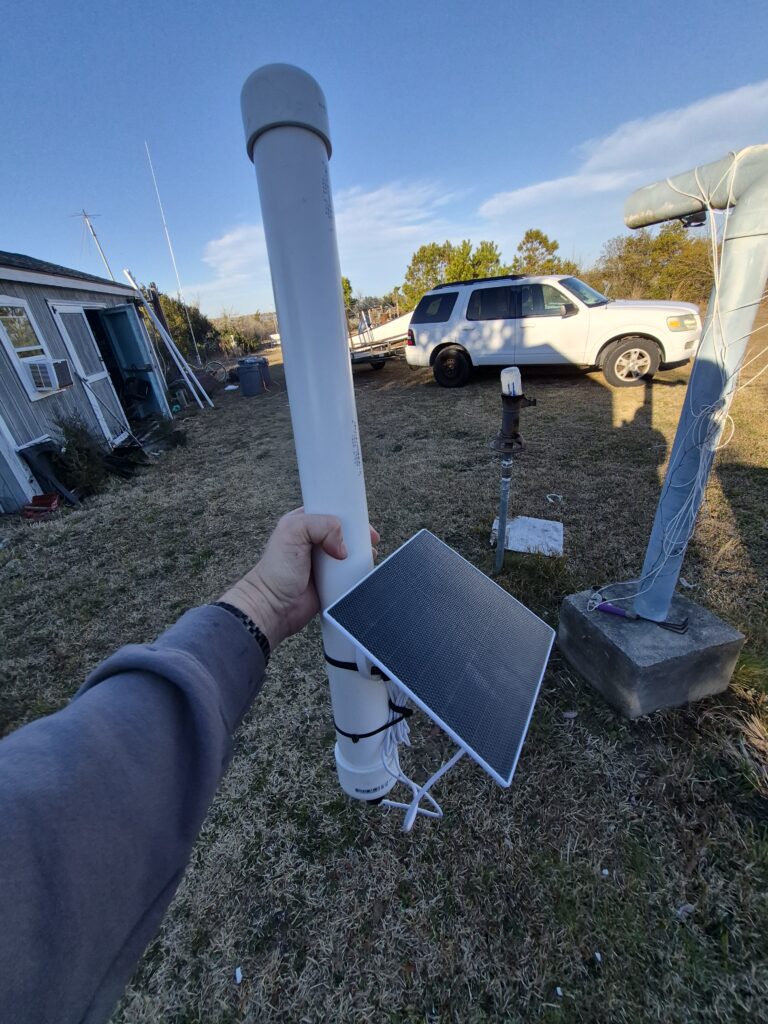
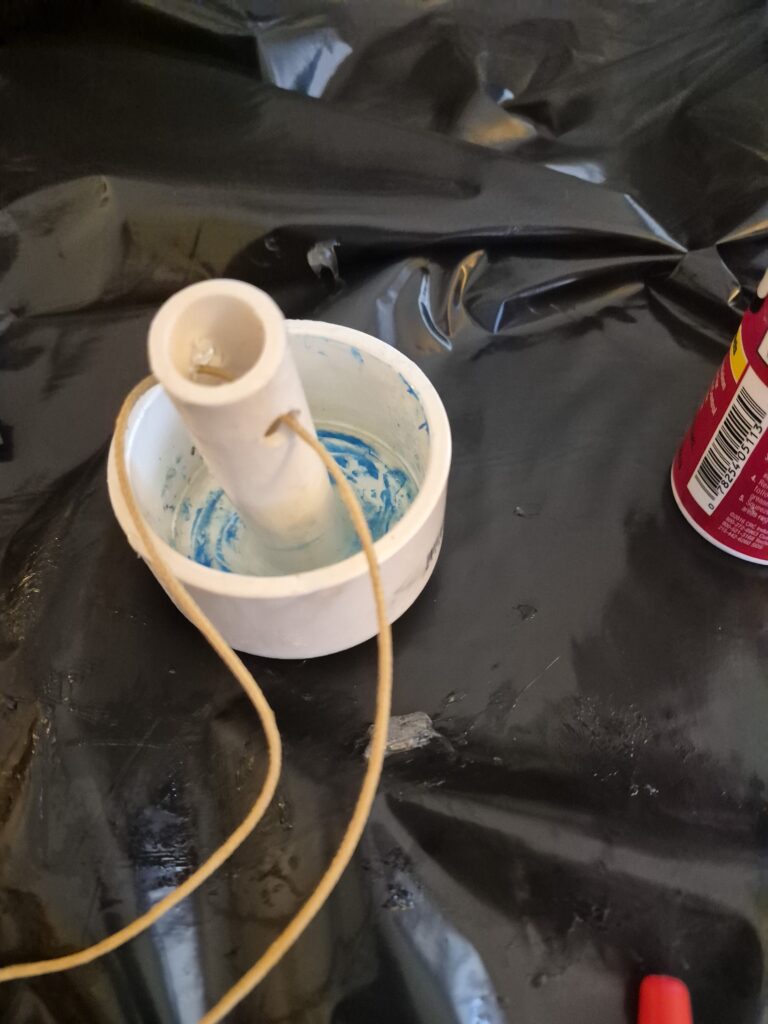
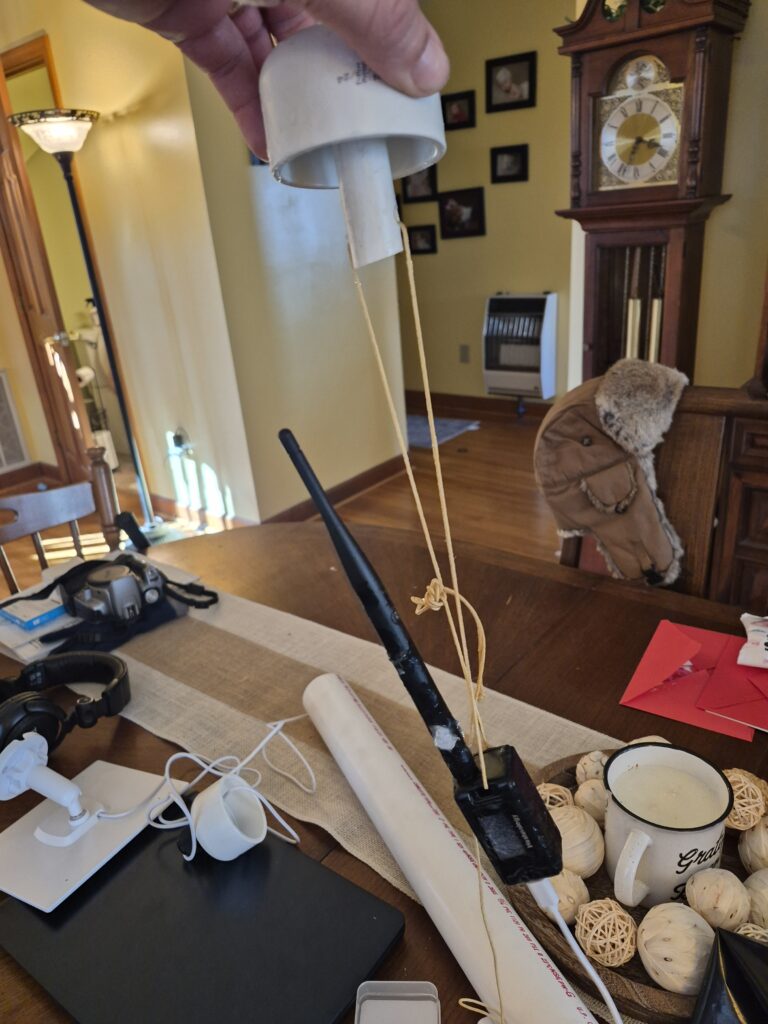
I decided to mount the assembly inside 2” PVC. For the top I used a standard PVC end cap, but glued a smaller piece of PVC so I can attach a string to it. I originally tried standard PVC glue but had trouble getting it to adhere like I wanted it to. Instead, I just used a full tube of Dollar Tree Five (5) Minute Epoxy. This seems to hold very well.
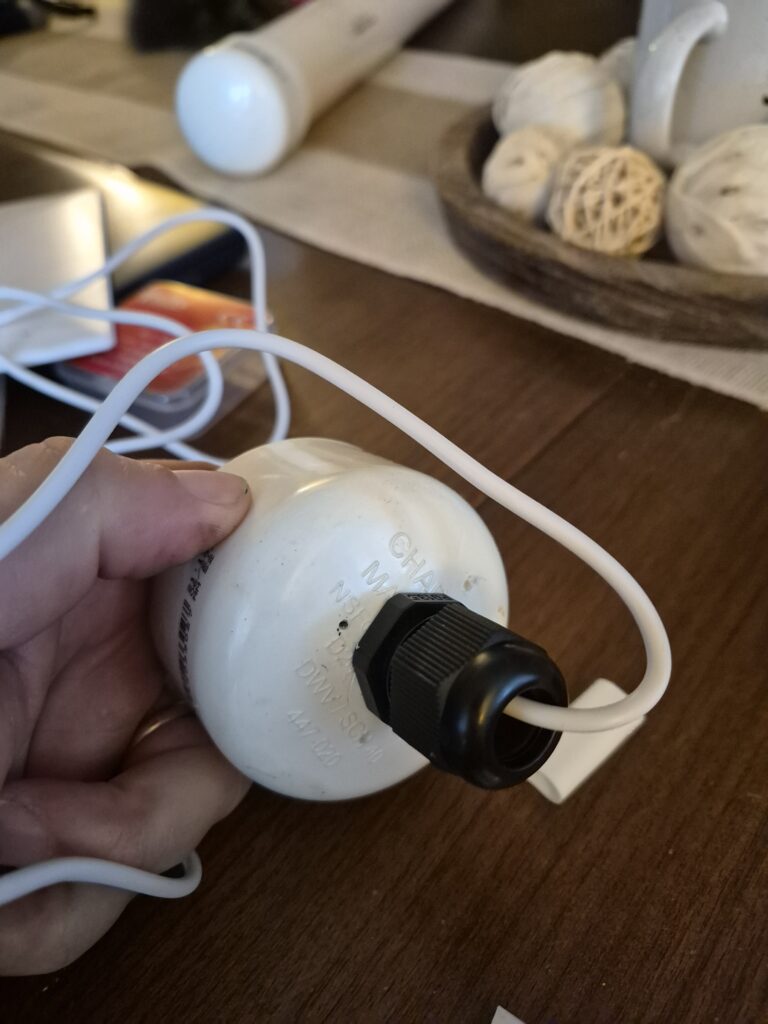
For the bottom, I use another PVC end cap. In this case, I attach a cable gland (I had a pile of them laying around) and drilled several weep holes to drain any moisture/condensation that may accumulate. I then slide the USB cable from the solar charger into the gland. I built up the cable with Teflon tape to get a better seal in the gland.
I then make the internal assembly by tying the radio to the top end cap, leaving enough room for the antenna. I then tie some remaining string to the USB cable for strain-relief and connect the solar charger to the USB port on the Heltec. The Heltec has a built in charge controller that can recharge the batteries. I decided not to glue the end caps on. If I had to glue one, I would have glued the bottom one, as that would be the one I’d be most concern with water intrusion. Instead, I’m taking the bet that even when not glued on the assembly will be rain and splash proof.
I then attached the solar charger to the PVC pipe with just a zip tie. I tidied up the wires and have what I hope is a weather resistant/corrosion resistant metastatic router/repeater.
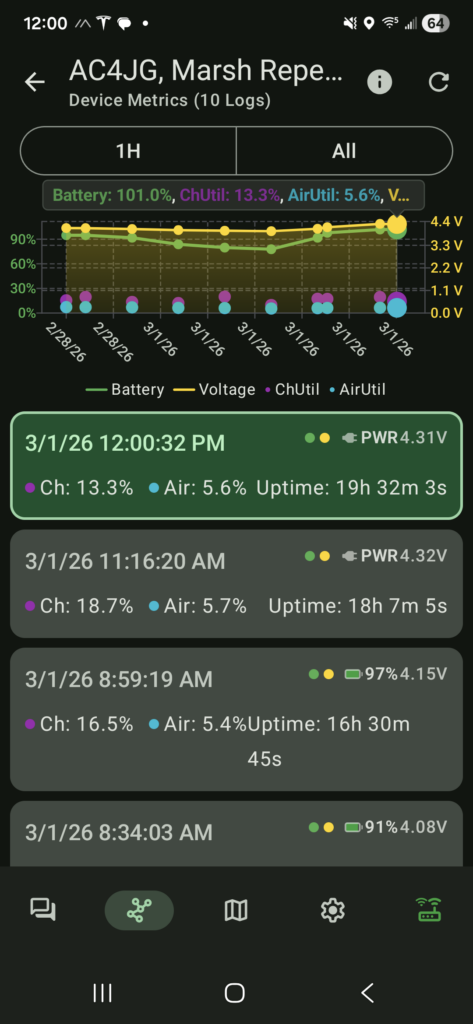
Over the first night, the battery draw was reasonable and it recharged in a few hours. This is hopeful. I’ll keep an eye on it for about a week before I put it in the final location.
Update.  3/19/26
It looks like I often loose the node during sunlight hours.  Researching on the internet indicates that the Heltec's are very picky about USB input voltage.   My guess is that the batteries are charging, but it's not stable while it's charging.

If I had to do it over again, I'd try the RAK4631, which I understand is much more tolerant to solar charging.
Amazon link

Beyond that, I'm very happy with the performance.  It's been out there a while now, and I think it's weather/salt proof enough to be a good concept.